
Episode 2.0: Before you start
The groundwork before you install a command-line AI agent, Windows first with the Mac beside it: open a terminal, find your way around with four words, make a project folder, install Git and Python, and choose an account.
Downloads
AI for Research Efficiency, episode 2.0, with Douglas Hutchings. Narration: an AI-generated voice (ElevenLabs).
The groundwork before you install a command-line AI agent: a terminal, four words to find your way, a project folder, Git and Python, an account, and the two speeds. Commands as of 2 October 2026; check the linked documentation before you run them.
1. Open a terminal
- Windows 11: press the Windows key and X together, then choose Terminal. It opens Windows PowerShell; the prompt starts with
PS. - Windows 10: press the Windows key and X, then choose Windows PowerShell.
- Mac: press Command and Space, type
Terminal, press Return.
2. Four words to find your way (Windows PowerShell and a Mac)
pwdlscd Documentscd ..pwd shows where you are, ls lists what is here, cd goes into a folder (cd .. goes back up), and mkdir makes one. In PowerShell, pwd, ls and cd are aliases Microsoft documents for Get-Location, Get-ChildItem and Set-Location.
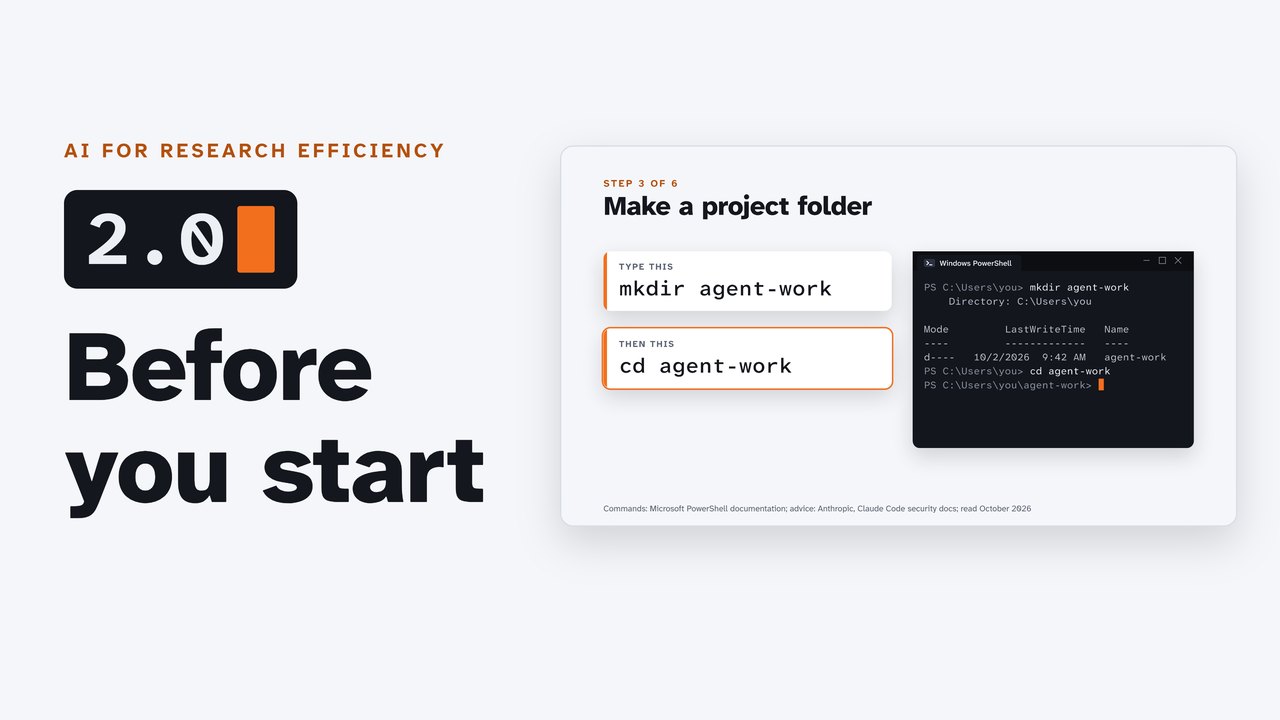
3. A project folder
mkdir agent-workcd agent-workStart every agent here, never in your home folder.
4. Git and Python (Windows, with winget)
winget install --id Git.Git -e --source wingetWindows
winget install --id Python.Python.3.14Mac
Then close the terminal, open a new one, and check:
git --versionpython --versionMac: Git comes with Apple's command line tools (xcode-select --install); Python from the installer at python.org.
If you see "git is not recognized": the terminal has not caught up with the install. Open a new terminal and try again. On a computer your campus manages, an install may be blocked: ask your IT team.
5. An account
Each agent needs an account with its maker: a monthly plan, or an API key that you pay for as you use it.
| Tool | Monthly plan | API key | Free option |
|---|---|---|---|
| Claude Code (Anthropic) | Claude Pro, Max, Team or Enterprise (the free claude.ai plan does not include Claude Code) | Anthropic Console | none |
| Codex CLI (OpenAI) | ChatGPT Plus, Pro, Business, Enterprise or Edu | OpenAI API key | see OpenAI's pricing page |
| Antigravity CLI (Google) | Google AI Pro or Ultra raise its limits | Gemini API key | a free individual tier with weekly limits |
Prices change; read each vendor's current page. Your campus: if it gives you an AI license, ask whether it covers these tools, and check the rules for research data before you point an agent at it.
6. Two speeds
At first, have the agent ask before each step, and read what it wants to do. When you trust it with a task, switch on its automatic mode: the work goes much faster. Either way, keep a copy with Git, and check its results.
Sources
Read on 2 October 2026 (copies kept with the project).
- Microsoft: Windows Terminal (Windows Terminal is now the Default in Windows 11 (opens in a new tab)), PowerShell (
Get-Location,Get-ChildItem,Set-Location), winget. - git-scm.com (Git for Windows with winget (opens in a new tab)); OpenAI's Windows guide (Python with winget (opens in a new tab)); python.org (the newest release (opens in a new tab)).
- Anthropic, OpenAI and Google: plan and pricing pages, and each tool's setup documentation (Anthropic, Claude Code setup (opens in a new tab) and Troubleshoot installation and login (opens in a new tab); Google, Antigravity pricing (opens in a new tab)).
Corrections
None so far. If you find something wrong, email doug,@douglashutchings.com.
Transcript
Every spoken line, by chapter
Before you start
By the end of these short episodes, an AI agent will be working in a folder on your own computer.
First, a little groundwork. It takes a few minutes, and you only do it once.
AI for Research Efficiency. Episode 2.0: Before you start.
Last time, we saw why an agent can do more on the command line: it works in your files, with your programs.
In this episode: open a terminal, find your way around, make a project folder, install two helpers, and choose an account.
1. Open a terminal
Step one: open a terminal.
On Windows 11, press the Windows key and X together, then choose Terminal.
On a Mac, press Command and Space, type Terminal, and press Return.
On Windows you'll see PS, then the folder you're in. That's the prompt: PowerShell is waiting for you.
2. Four words
Step two: four words to find your way. They work on Windows and on a Mac.
pwd shows where you are.
ls lists what's here.
cd, then a folder's name, goes into it. cd .. goes back up.
And mkdir, then a name, makes a new folder.
3. A project folder
Step three: make a project folder for your agent, and go into it.
Type mkdir agent-work and press Enter. Then cd agent-work.
This is where the agent will work. Always start it in a project folder like this one, never in your home folder.
4. Git and Python
Step four: two helpers, installed with winget, the installer built into Windows.
Git can keep a history of every change in your project folder, so you can go back. Your agent can set it up for you.
Python is a tool agents use to read Word, Excel and PowerPoint files.
Paste each line from the companion page, and press Enter. Each one starts with winget install.
Then close the terminal, open a new one, and check: git --version, and python --version. Each prints a version number.
If it says git is not recognized, the terminal hasn't caught up with the install. Open a new one, and try again.
5. An account
Step five: an account. Each agent needs one with its maker: a monthly plan, or an API key you pay for as you use it.
Google's Antigravity also has a free tier. Today's details are on the companion page.
If your campus gives you an AI license, ask whether it covers these tools, and check the rules for research data first.
6. Two speeds
Step six: two speeds. At first, have the agent ask before each step, and read what it wants to do.
When you trust it with a task, switch on its automatic mode, and the work goes much faster. Keep a history with Git, and check its results.
Try it
Pause now: open a terminal, make your project folder, and run git --version. You should see a version number.
Review and next
So: a terminal, four words, a project folder, Git and Python, an account, and two speeds.
Next, install your first agent. Pick one: Claude Code, Codex CLI or Antigravity CLI. They work the same way.